One of my favourite Christmas traditions, when it comes to gift giving, is making gifts for loved ones. My grandmother is a sewer and knitter, I remember receiving her box every year, looking forward to the comfy sweaters with my favourite characters on them. My husband is a wood crafter and makes exceptional items for E and V. He has a shop on Etsy with items there being inspired by what he would like to recreate for the girls, so they often get the prototype.
There’s just something special about a homemade gift. Once seen to be “cheap”, I think people start to realize the time, energy, and love that goes into each pi.
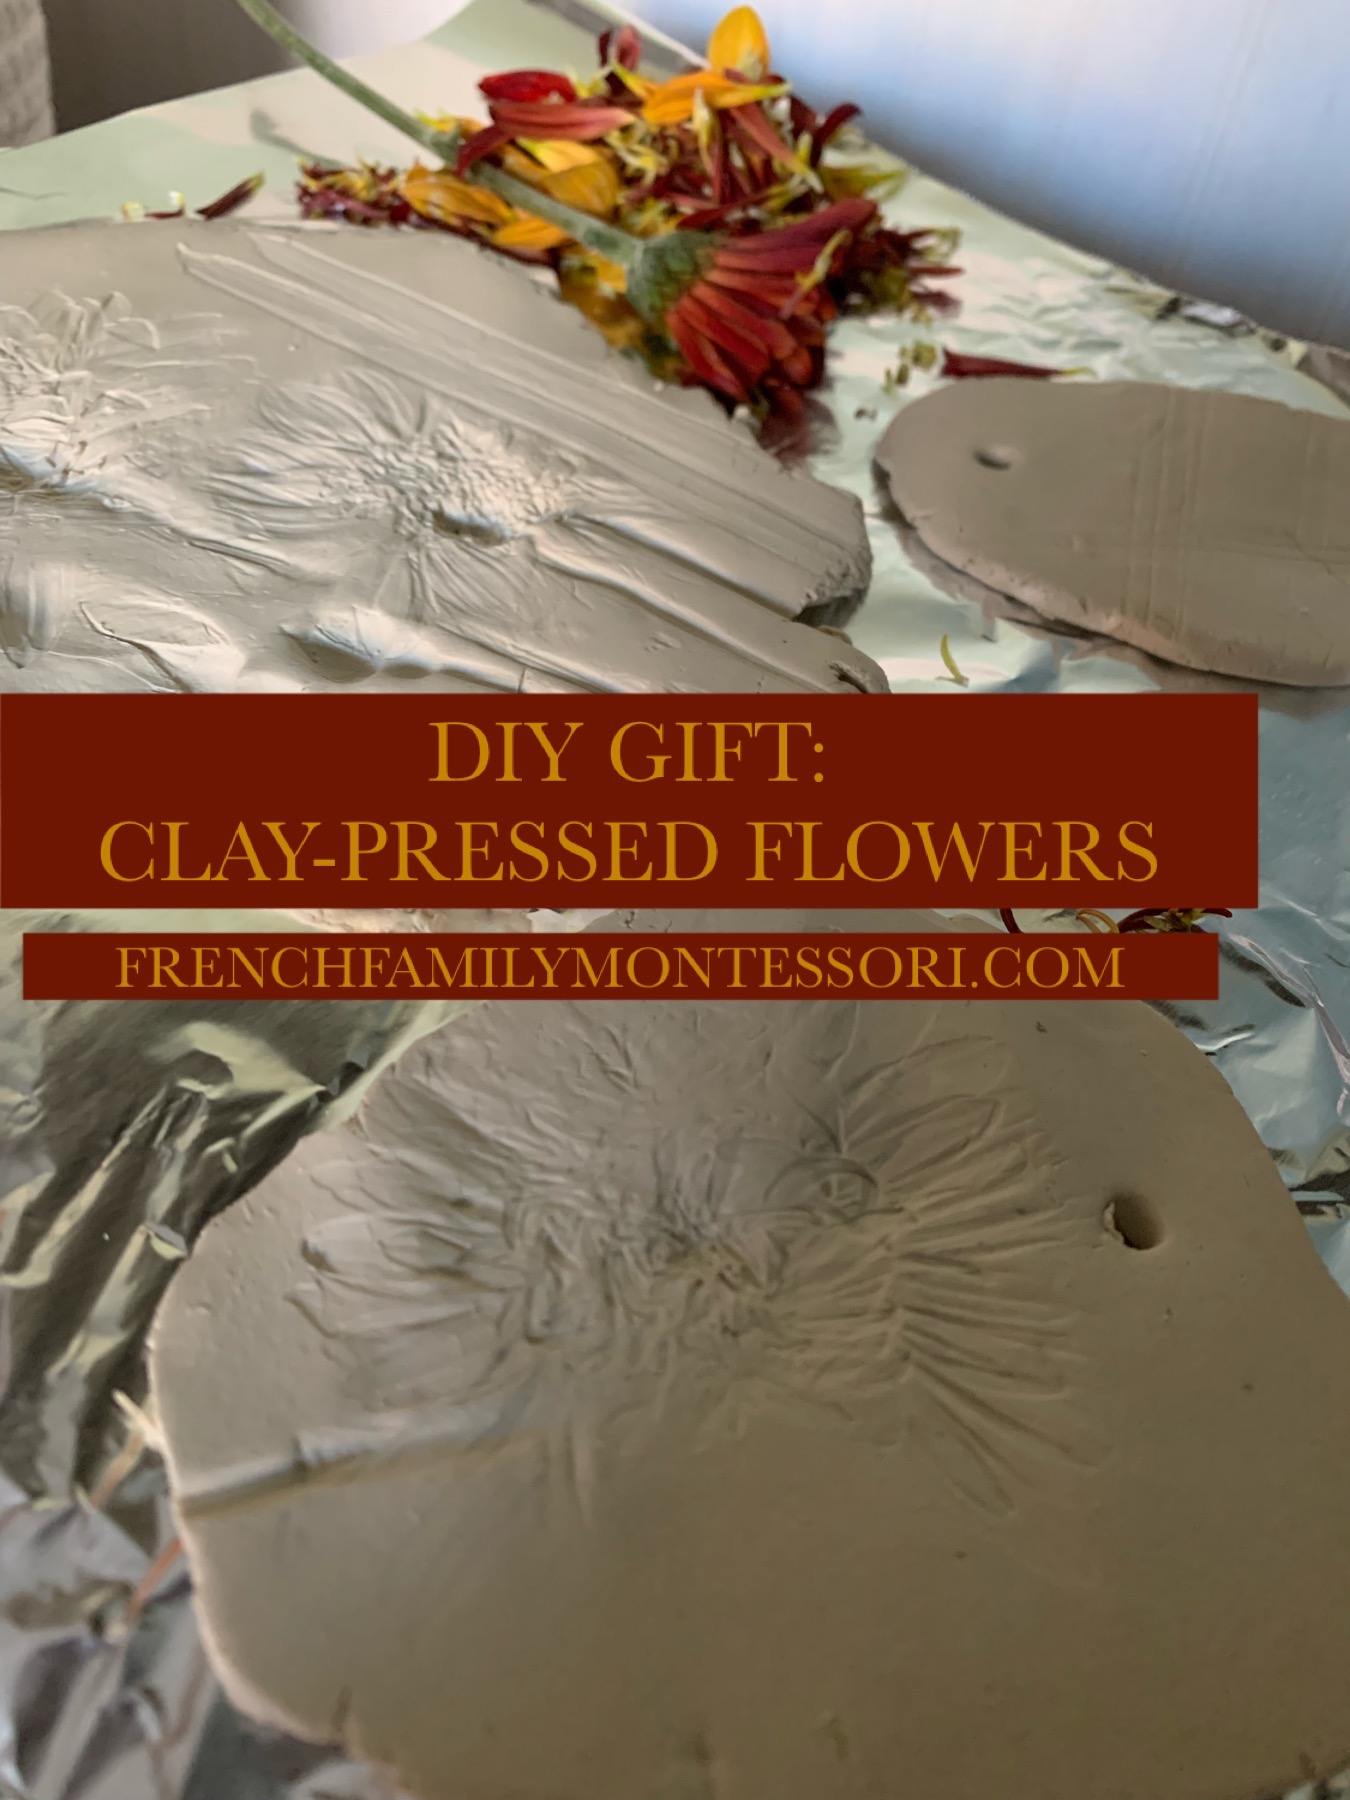
This year I had a plan in mind, but when I tried to create it, it didn’t turn out. Thankfully we started in early October so their failure didn’t cause an emergency on our part. Then I decided on clay-pressed flowers because, well, I saw one on Etsy and wanted one myself as there’s just something so wonderful about them. I thought they couldn’t be too difficult to make and, ultimately, we wouldn’t know unless we tried.
What I wanted to do was create personalized flower family portraits. (I’m going to be honest, I’m not sure if I worded that accurately, so hopefully the explanation helps, haha.)
What we used:
-rolling pin, preferably a small one like this.
-a chopstick, or another narrow tool, to make a hole for hanging,
-Flowers. We used flowers and other bits from nature with texture; like mums, cattails, ferns, baby breath, and wheat.
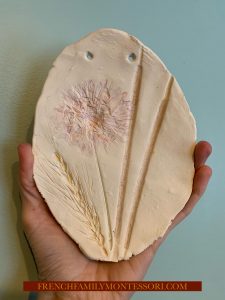
As I shared earlier, I wanted to do family portraits via flowers. So E, V and I searched for flowers that reminded us of the person they were meant to represent or what we knew to be their favourite. For example, my sister loves roses, so for her’s, and to represent her in the press for my mum, we used a rose. My cousin loves cats. So in her clay pressed we used cattails to represent her daughters. We used wheat to represent her husband and my grandfather as it’s a staple and withstands storms, as it just seemed fitting.

First, we rolled out the clay–I’m partial to an ellipse or oval shape. I recommend using wax paper (I only had some old aluminium) so that it may be moved with little disruption. Using a chopstick or similar tool, create a hole, or two if larger, to allow the piece to be hung from later. We then arranged the flowers/items, this part I helped with this. E and V then rolled over the flower with their small rolling pin (no pictures as I tried to assist in keeping the flowers in place). We kept the flowers in place and allowed the clay and flowers to be for 24 hours.
Once 24 hours has passed I removed the flowers from the clay. We then waited for the clay to dry fully. To be safe, we waited 1-2 weeks, but that depends on the thickness of the clay.
Once fully dry, we painted. You don’t have to paint. Honestly, they look so gorgeous as is. I gave E and V the choice and they chose painted.
I did the painting using watercolour. Rather I used more water than actual paint as the colour is rather vivid against the bare clay and I wanted subtle colour. Remember, you can always build up colour but it’s rather difficult to remove without potentially damaging the impressions.
To paint, I just held the brush to an area and allowed the water and paint to find their way. This may be rather difficult to picture, so I’ll share a video on Instagram here.
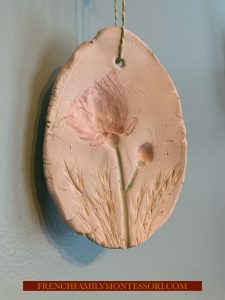
Once all was dry I used twine so that they may be hung.
And with that, they are dry and ready to be gifted.